Gnome For The Holidays Christmas Party

There’s no place like Gnome Sweet Gnome with a cup of hot cocoa! With this year finding more of us at home, I wanted to design a set that really focused on creating special moments at home. This set is equally darling to use for a cookie decorating party or just to create a fun evening at home for the kids.

Gnome Christmas Party- Nestling Design

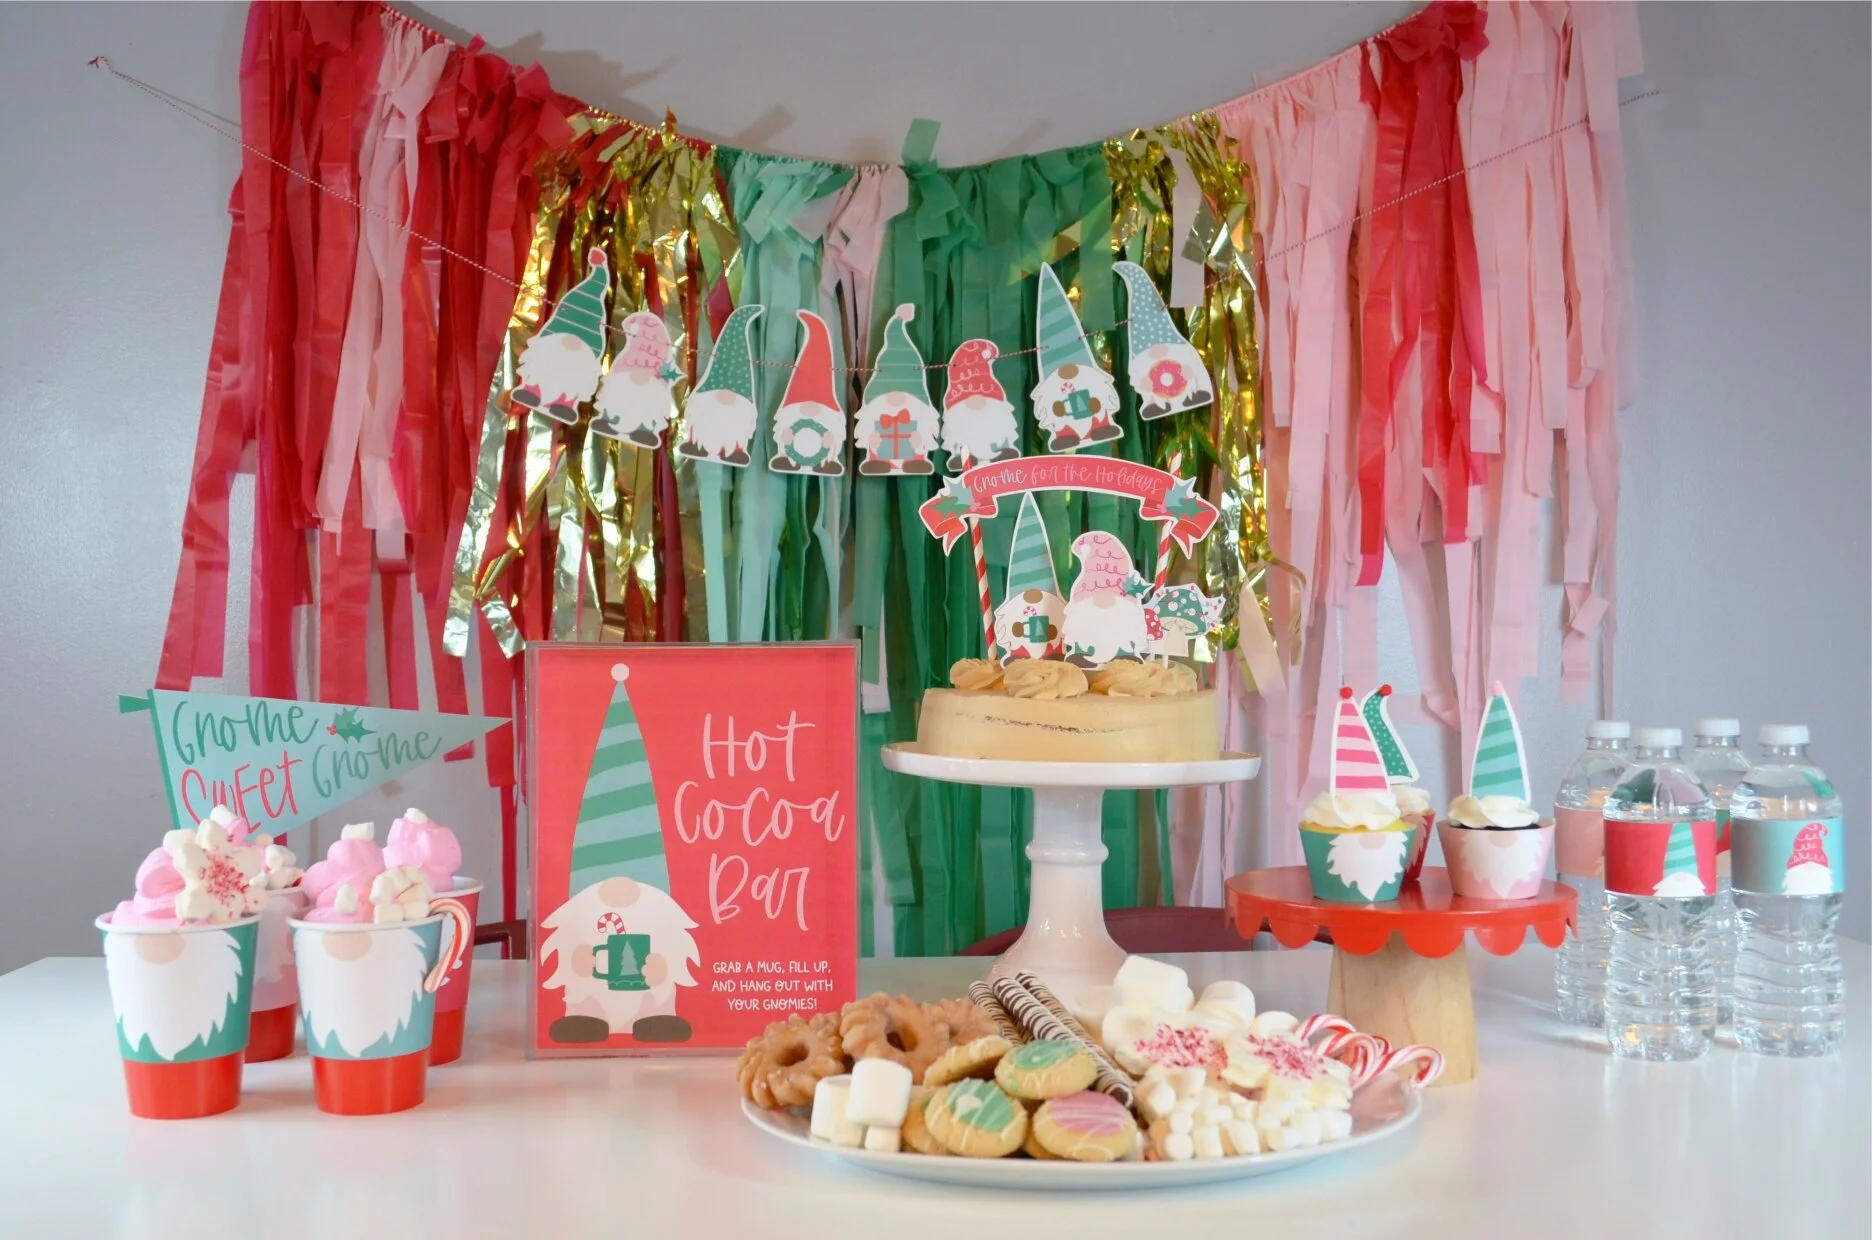
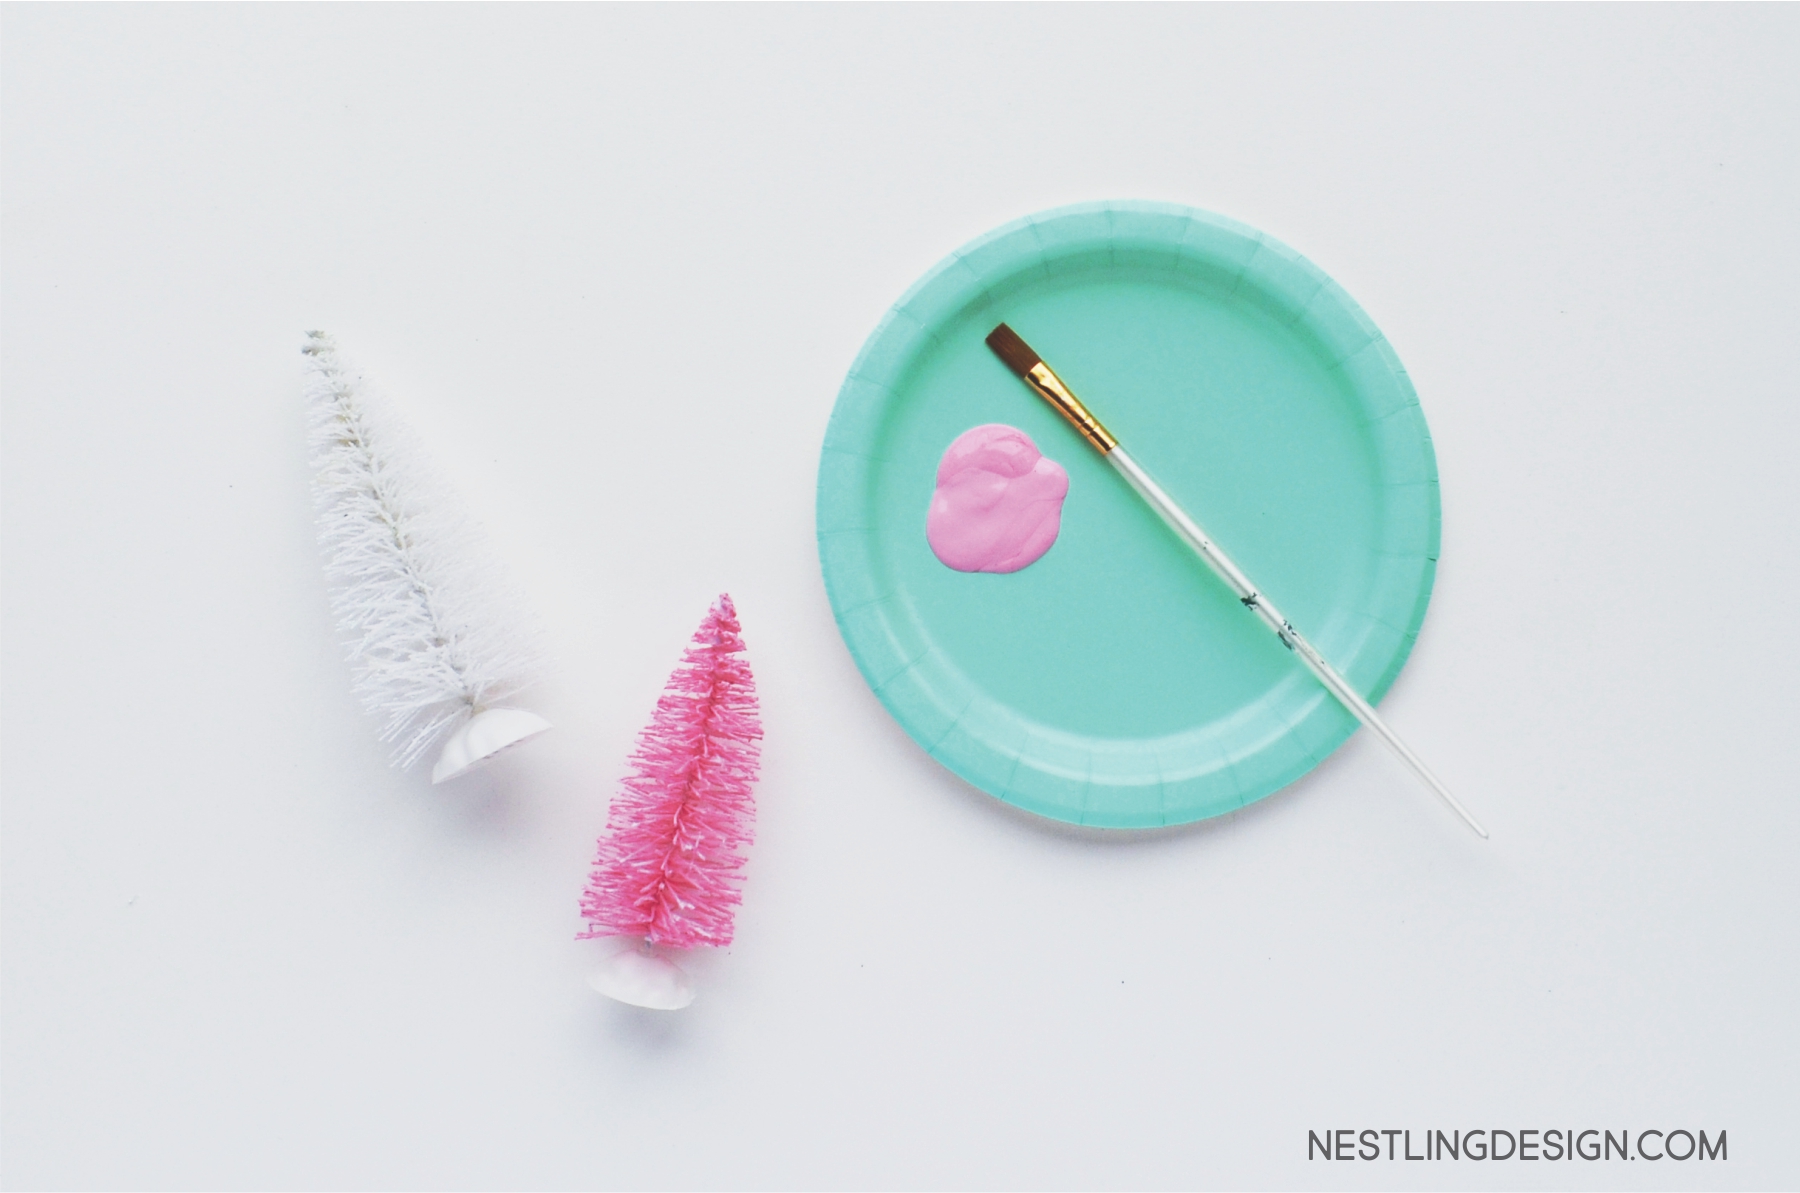
Truth be told, these cup wrappers were my main source of motivation for this theme. I knew I wanted to serve hot chocolate and have the whipped cream act as the hat. All I did to create this pink whipped cream was add a couple of drops of red food coloring to our go-to home made whipped cream recipe.

Gnome Christmas Party- Nestling Design

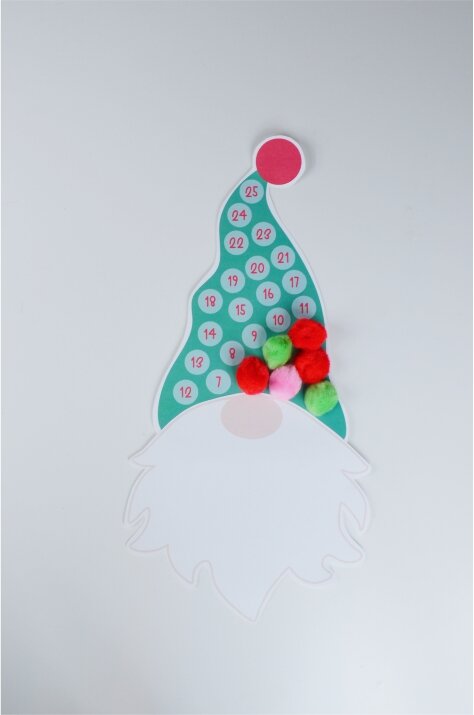
Pom poms add an easy and adorable detail to the food tents and cupcake toppers alike.

Gnome Christmas Party- Nestling Design

We’ve included the entire Gnome Christmas Village in this set as well - perfect for decoration or play!

Gnome Christmas Party- Nestling Design

I hope you love this set as much as I loved making it.

Happy Holidays!

Printable Gnome Christmas Village

There’s no place like gnome for the holidays, amiright? 2020 has thrown us all a bit of a curveball and as we find ourselves inside more this season I knew I wanted to focus a little more on easy items for play vs. the typical party packages we are known for.

Gnome Holiday Village - Nestlig Design

This whimsical gnome village would be equally adorable on a Christmas mantle, as a centerpiece for a cookie decorating party, or simply to be used as a toy. Since you can print up as many as you like, these could also make adorable DIY gifts!

Gnome Holiday Village - Nestlig Design
Gnome Holiday Village - Nestling Design

I had so much more fun than I expected designing these. My daughter actually came up with the idea for this building - a hat store for gnomes. Can you even?! How stinking cute did this turn out?

Gnome Holiday Village - Nestling Design

You can easily personalize these a bit by adding small details such as the pom pom addition to the nose or hat shown below.

Gnome Holiday Village - Nestling Design

In total, there are 10 village buildings (each with a unique 4-sided design), 15 gnomes, and 4 cone trees.

Gnome Holiday Village - Nestling Design

Isn’t this just the cutest?! Our little model had a blast playing with this while I snapped photos - I just know yours will as well.

I hope this season finds you well, despite of the craziness this year has brought us.

Gnome For The Holidays Christmas Village
Sale Price:$5.50 Original Price:$10.00
Add To Cart

{Free Printable} What's Your Gnome Name?

Have you ever just wondered….what would my gnome name be? Well ladies, look no further as I have all your answers ready, ha! This fun printable is perfect a party, school function, or just a night in with the kids! My kids had a blast figuring out there. Link to download below…. let us know in the comments what your name is!

xo - Merry McGiggles ;)

Gnome Free Printable - Nestling Design

{Free Printable} Gnome Countdown To Christmas

Raise your hand if you’ve got a little one who just can’t wait until Christmas!

Waiting is hard and kids do best with fun visuals to show them how many days are left until the big day. I knew right away that I wanted to share a free printable countdown with our new Gnome For The Holidays Collection. This freebie prints easily onto (2) sheets of paper and is the perfect size for little ones to glue on pom poms. Download below and be sure to tag us in your photos: @nestlingdesign. I can’t wait to see your finished results!

Gnome Free Printable - Nestling Design

DIY WOODEN CUTLERY

3 Ways To DIY Wooden Cutlery | NestlingDesign.com

This DIY stemmed from me wanting super cute wooden forks to match our party, but not wanting to spend $$$ on just a small set (so I guess this DIY was born out of my cheapness?? LOL). Since the ones I were looking at were simply painted on the edge, I knew I could easily replicate it as well as come up with a few other ways to jazz up your own.

SUPPLIES:

I’m showing 3 different ways you can decorate your own forks, so I’ll list all the supplies I used for each option as we go over them. One thing you will need for all of them are wooden forks.

Wooden Forks


OPTION 1 : PAINT

3 Ways To DIY Wooden Cutlery | NestlingDesign.com

Supplies Needed:

Acrylic Paint (nail polish could work fine here, too)

Painters Tape (optional; I didn’t use any but it would really help create crisp lines)

Paint Brush

3 Ways To DIY Wooden Cutlery | NestlingDesign.com

Step One: Paint a uniform color on the edge of your forks (be sure to stay clear from the side that you eat on) or paint a design. Polka dots, stripes, geometric - anything you want! Let dry and repeat on other side if you choose.


That’s it! Since you can match your color to coordinate with any party you’ll always have matching silverware.


OPTION 2 : SCRAPBOOK PAPER

3 Ways To DIY Wooden Cutlery | NestlingDesign.com

Supplies Needed:

Scrapbook Paper (the patterned paper we use in our party sets would work well for this too!)

Glue I just used a regular glue stick

Mod Podge (optional; I didn’t use it over our glitter paper, but it would be great for regular craft paper)

Paint Brush if using mod podge

3 Ways To DIY Wooden Cutlery | NestlingDesign.com

Step One: Trace the edge of your silverware on the back of the paper. Repeat until you have desired amount. You can make this shorter or longer than shown.

3 Ways To DIY Wooden Cutlery | NestlingDesign.com

Step Two: Cut out and glue onto tops of forks. Trim any excess as needed.

3 Ways To DIY Wooden Cutlery | NestlingDesign.com

Step Three (optional): Cover paper with Mod Podge. Do not paint onto area that will be touching food.

3 Ways To DIY Wooden Cutlery | NestlingDesign.com

I honestly didn’t think I would love this option as much as I did! The glitter worked really nicely with our Christmas party. With all the fun patterns out there, I have no doubt I’ll be using this method again!


OPTION 3 : WASHI TAPE

3 Ways To DIY Wooden Cutlery | NestlingDesign.com

Supplies Needed:

Washi Tape You can pretty much find this anywhere now - craft stores and Etsy have a great selection.

Mod Podge (optional): As with the scrapbook paper this is an optional thing to do afterwards. Most of our washi tape stayed on with no trouble, but we did have one that started to peel curl up the next day, so this would help hold it down.

3 Ways To DIY Wooden Cutlery | NestlingDesign.com

Step One: Making sure you are starting with a crisp, clean cut apply the washi tape to the fork, leaving some to hang over the edge.

Step Two: Trim any tape that is hanging over edge.

Step Three: Apply mod podge if desired.

3 Ways To DIY Wooden Cutlery | NestlingDesign.com

This was definitely the easiest and fastest method, and with so many patterns out there you definitely have a lot to play around with!

3 Ways To DIY Wooden Cutlery | NestlingDesign.com

So what do you think? Would you try this DIY out? I personally know for a fact that I will be using this in the future!

xo - Rachel

Pin for later.png
3 Ways To DIY Wooden Cutlery | NestlingDesign.com

DIY WIRE BRUSH CHRISTMAS TREES

DIY Wire Brush Christmas Trees | NestlingDesign.com

This was such a super fun and easy DIY. I originally wanted to make them because I was having a hard time finding inexpensive trees in the colors I wanted for a party we were staging, but ended up loving how they turned out so much that I painted some in each of our branding colors! You could easily paint them in neon colors, muted colors, pastel, etc. You can literally paint them in any color to match anything you want - all for super cheap!

SUPPLIES NEEDED:

DIY Wire Brush Christmas Trees | NestlingDesign.com

Brush Pipe Trees (preferably white). The best place I found white trees were from the Dollar Tree. I found some from Walmart, but the ones from Dollar Tree were actually cheaper (because they came in packs of 2), better quality, and had two different sizes.

Acrylic Paint. You can easily find this at a craft store. Spray paint would work as well, but you will be more limited in your color choices.

Paint Brush. Fair warning - this project will take a toll on the paint brush, so do not use an expensive one.

DIY Wire Brush Christmas Trees | NestlingDesign.com

Step One: Holding the tree by the base, paint the tree in the color you want. You really want to dab it on, making sure to get that inner trunk painted so it’s not still a bright white. I had to really push our brush in. While it’s still wet you can line the edges in fake snow or glitter if you like (we opted to leave ours plain). You don’t have to paint it one color - ombre would look amazing!

DIY Wire Brush Christmas Trees | NestlingDesign.com

Step Two: After the trees are dried you can paint the bases if you like. I choose to paint ours in a metallic gold.

DIY Wire Brush Christmas Trees | NestlingDesign.com

That’s it! I used ours to stage with our gingerbread village and to use as decoration in our office. I am obsessed with how they came out.

DIY Wire Brush Christmas Trees | NestlingDesign.com

I mostly painted ours to match our branding (can you see how great they look with this site?! haha), but I really kind of want to try a neon one, too. If you try this out tag us on instagram @nestlingdesign - I’d love to see how they turn out!

xo - Rachel

Pin for later.png
DIY Wire Brush Christmas Trees | NestlingDesign.com

DIY PARTY CRACKERS

DIY Party Crackers | NestlingDesign.com

I’ve been seeing these party crackers pop up everywhere lately, and my mind naturally went to wondering how I could make our own to fill with whatever I wanted. It ended up being a pretty easy craft that was a lot of fun!

SUPPLIES NEEDED:

DIY Party Crackers | NestlingDesign.com

Paper Tubes I just used toilet paper rolls, but you can buy craft tubes online.

Decorative Ribbon

Decorative Paper or Wrapping Paper I used both printed patterned paper on plain copy paper and wrapping paper. Wrapping paper worked best, but both were easy to work with.

Tape I used both regular and double-sided tape

OPTIONAL:

Goodies like candy, balloons, etc to fill up the package

Embellishments such as stickers, pom poms, stamps, paint, etc

DIY Party Crackers | NestlingDesign.com

Step One: After cutting your paper to size, begin by taping one side to the roll. I used a piece about 8” tall and 9” wide. You can just eyeball it, though.

DIY Party Crackers | NestlingDesign.com

Step Two: Trim any excess paper and tape to tube using double sided tape.

Step Three: Using your ribbon, tie one end shut as pictured below. I started to tighten it slightly and then gently pushed the paper in with my fingers before tightening it all the way. Double knot.

DIY Party Crackers | NestlingDesign.com

Step Four: If filling with candy or goodies, do so now.

Step Five: Tie second side close.

DIY Party Crackers | NestlingDesign.com

Step 6 (optional): Add your embellishment. I used glittery letter stickers (this would be perfect to spell out your guest’s names!) and pom poms.

DIY Party Crackers | NestlingDesign.com

That’s it! Repeat until you have as many as you need. You can use these for favor boxes or place settings. Throw some jingle bells inside for a fun Christmas noise maker.

DIY Party Crackers | NestlingDesign.com

To open you can either rip open (this is admittedly pretty hard to do - I used scissors for the pic below) or just untie the sides.

DIY Party Crackers | NestlingDesign.com

I really had fun with the DIY and plan on using it again for another holiday party we are throwing in a few weeks. I hope you find it helpful, too!

xo- Rachel

Pin for later.png
DIY Party Crackers | NestlingDesign.com

Gingerbread Christmas Party

Aside from Hallmark movies and a fabulous excuse to go shopping, one of my favorite things about the holidays are the parties! (shocking, I know LOL). Gingerbread decorating parties are such a fun event to host for kids (and grownups!) and I think it makes a great annual tradition.

For this party there were two things that made huge impacts - the fringe backdrop and the centerpiece made out of paper gingerbread houses.

Gingerbread Christmas Party | NestlingDesign.com

My original idea was to create a huge candy balloon garland, but after I found this backdrop I opted to use that instead and stick our candy on the ground. This worked out great anyway since kids like to touch all the things ;) We paired ordinary balloons wrapped in cellophane with these candy balloons I found on Amazon. This was also the first time that I got to try a new hack with Mylar balloons. Instead of inflating them with helium, we blew them up with air through a straw. This way they didn’t float. It was super easy and worked out perfectly.

Gingerbread Christmas Party | NestlingDesign.com

Another DIY we did for this party was making our own party crackers. This was a super fun, easy, and cheap way to create party favors that doubled as place settings. You can see how we made them here.

Gingerbread Christmas Party | NestlingDesign.com

Although we made ours with Christmas themed wrapping and wording, you could easily use other colors and spell out your guest’s names instead.

Gingerbread Christmas Party | NestlingDesign.com

To go with our little gingerbread village, we included little gingerbread people and trees that we glued onto little blocks to prop them up. Although I originally designed these for decoration, they ended up being a fun little toy for the kids to play with!

Gingerbread Christmas Party | NestlingDesign.com

This year we opted to try out graham cracker ‘gingerbread’ houses for the kids. They turned out great - I’m actually thinking of trying it again with something more elaborate. I’ll let you know how it goes!

Here are a few tips I have for the decorating:

★ Unless you are planning on eating your house, feel free to hot glue that thing together. I won’t tell if you won’t tell ;) Since it bonds almost immediately, it makes it easier to decorate without having it fall apart.

★ Use small trays like we did below (we lined ours with the patterned paper from the party set). This will help contain the mess a bit and to stop runaway sprinkles.

Gingerbread Christmas Party | NestlingDesign.com

There were two reasons I kept the roof part of the gingerbread houses open . First so that you can easily place a flame less candle inside, and secondly so that you can use them as gift boxes!

Gingerbread Christmas Party | NestlingDesign.com

Put together, these boxes are the perfect size for party favors or Christmas gifts. You could fill one with hot chocolate and marshmallows, a small stuffed animal, or more!

I know this party really put us in the holiday spirit - how about you?!

Blog Signature.png

SHOP THE PARTY

Pin for later.png
Gingerbread Christmas Party

WILD ONE WOODLAND BEAR PARTY

I’m so excited to finally share this darling Wild One bear party we threw. This theme is such a sweet way to celebrate an adventurous “wild” one, don’t you think? It’s got a fun camping vibe which I think is just perfect for Fall birthdays snuggled around campfires.

Wild One Woodland Bear Birthday Party

I’m a believer that all camping parties should include s’mores, and these sweet wooden trays were perfect for displaying all those goodies.

Wild One Woodland Bear Birthday Party

The picture above is such a lesson of turning lemons into lemonade. About a month before we styled this party, we had a huge tree from our neighbor’s yard fall into ours. What at the time seemed like the biggest hassle ended up being a (party) blessing in disguise as we got to use some of the branches (those aren’t even part of the trunk - that’s how huge this thing was!) as stools. How fun are these?!

Wild One Woodland Bear Birthday Party

I don’t know if you caught it, but the cake topper above is actually different then the one we originally staged with the party. I loved both designs so much I ended up keeping them both, ha!

Wild One Woodland Bear Birthday Party

I cut the top part of our cones and wrapped them around paper treat cups to make these adorable bear bowls - perfect for serving trail mix!

Wild One Woodland Bear Birthday Party

We jazzed up some dollar store paper plates by simply adding bear “ears” to the bottom of them.

Wild One Woodland Bear Birthday Party

We made these sweet Tic Tac Toe boards out of the same wooden disks we used for coasters (the set includes various sizes, so these were the smallest and are about 1.5” -2”. We got our set at Hobby Lobby)

Wild One Birthday Party Ideas | Nestling Design

Our favor bags consisted of teddy bears, honey sticks, and candy. The perfect set for any little Wild One!

Wild One Woodland Bear Birthday Party

What was your favorite detail? I’m obsessed with the wooden stools myself :)

Blog Signature.png

SHOP THE PARTY

Pin for later.png
Wild One Party Ideas | Nestling Design

HALLOWEEN GHOST PARTY

Halloween parties are one of my favorite parties to throw. Having a bunch of kids over in their cute little costumes…just doesn’t get better than that!

We wanted to keep this year’s theme more cute than spooky, so we went with a fun qhost theme. That may have been the main theme, but iridescent/holographic materials really stole the show! I’ve been watching this material creep into the party world, and I couldn’t wait to get my hands on it and put our own twist to it.

I actually created two versions of the invitation this year - one which features white ghosts and is perfect for printing and a second version perfect for digital invitations that feature iridescent ghosts.

I just love how they look in this fun iridescent texture!

Ghost 20.jpg
Halloween Ghost Party | NestlingDesign.com

I actually got to play around with another big trend I’ve been seeing around - tissue paper backdrops. I shared some behind the scenes details on how I created ours in our Instagram Stories (under the ‘Party DIY’ tab). I am obsessed with how it turned out and will for sure be using this technique more in the future!

Halloween Ghost Party | NestlingDesign.com

I added a little sparkle to our ghost cake toppers by gluing a bit of white and iridescent tissue paper to the bottom. I felt like that also help tie it into the backdrop and pinatas.

Halloween Ghost Party | NestlingDesign.com

Our “Spooky Popcorn” was super easy to make! We just popped some popcorn and then drizzled it with white and black candy melts. While the chocolate was still we we sprinkled candy sugar, sprinkles, and candy eyes on top. Once the chocolate has hardened, you can separate into smaller servings.

Halloween Ghost Party | NestlingDesign.com

For a fun twist with our classic bag toppers, I cut off just the front label and wrapped them around some poppers I have. It made a cute way to display our “ghost poop” at the party!

Halloween Ghost Party | NestlingDesign.com

We all know Halloween = candy, so who am I to put a stop to that tradition?? ;) Mini ghost pinatas filled with candy where handed out as favors.

Halloween Ghost Party | NestlingDesign.com

Another holiday party in the books! Can’t wait to plan the next :)

SHOP THE PARTY

Pin for later.png
Halloween Party